Cameo_Pixbar650CPro
This is another example for creating a vis file (old visualiser personality) from a d4 file (Titan personality). The fundamentals are described in Creating vis files from d4 personalities. Here, only the little details are explained.
- this fixture has subfixtures (cells) - a feature neither the classic consoles nor the visualiser support
- instead, we build a vis personality which at least shows cell #1 so that we have an impression if the fixture should work
- colour temperature control is not supported
- patterns and sound are not implemented in the visualiser (they are in no visualiser I know of)
Apart from that it works reasonably well in the visualiser.
The DMX table:
(full DMX tables are in the manual which is included in the zip below)
Most importantly, when setting the Classic Pearl References in the Personality Builder, we also need to add the attributes to the respective Compatibility Attributes sections of the multicell modes as this is where R20 and VIS files are created from:
- add references for the 26ch and the 30ch modes (I used UKCM65C5 and UKCM65C6)
- unfold both modes (left panel)
- top-right, in the Created Attributes tab, doubleclick on the attributes you want in that mode (26ch: Dimmer, Shutter, Red, Green, Blue; 30ch: Dimmer, Shutter, Red, Green, Blue, Colour Macro, CTO, Auto, Sound) - the attributes are assigned channels in the order you add them, thus adding in the correct order makes life easier

The coubleclick adds each attribute to the selected mode (here: compatibility attributes). Alternatively you can drag and drop the attributes there.
Now you can proceed with generating R20 and VIS files as described.
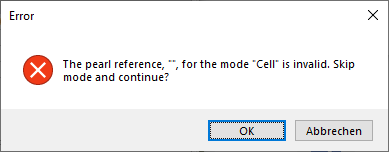
In between generating the files you'll get the error message

This is normal as we don't need R20 and VIS files for the hidden Cell mode. Click OK to skip and continue.
Checking and editing the VIS files is straight-forward - simply adjust the DMX ranges, add missing ranges, change some fixed colour ranges to colour scroll ranges:
- m1 - 2ch (UKCM65C1.VIS)
- Color Wheel 1: adjust 1st range, change last ranges to speed (color change)
- m2 - 3ch (UKCM65C2.VIS)
- Shutter: adjust range dmx end
- Color Wheel 1: adjust 1st range, change last ranges to speed (color change)
- m3 - 3ch m2 (UKCM65C3.VIS) not in DMX chart, seems to be okay for RGB, leave it untouched
- m4 - 9ch (UKCM65C4.VIS)
- Shutter: adjust range dmx end, add last Open range (251~255)
- Color Wheel 1: adjust 1st range, change last ranges to speed (color change)
- CTO/Color Wheel 2: adjust range dmx end
- m5 - 26ch (UKCM65C5.VIS)
- Shutter: adjust range dmx end, add last Open range (251~255)
- m6 - 30ch (UKCM65C6.VIS)
- Shutter: adjust range dmx end, add last Open range (251~255)
- Color Wheel 1: adjust 1st range, change last ranges to speed (color change)
- CTO/Color Wheel 2: adjust range dmx end
Example: changed Shutter definition:
// Shutter
ChanRef Dimmer
    Vismode Strobe
    UseBits 1 2 3 4 5 6 7 8
    DmxOffset 2
    Mapping 0 5 1 1
    Mapping 6 10 0 0
    Mapping 11 33 30 300
    Mapping 34 56 1 1
    Mapping 57 79 1 1
    Mapping 80 102 30 300
    Mapping 103 127 1 1
    Mapping 128 250 30 300
    Mapping 251 255 1 1
End
The edited and tested files are in this zip: cameo_pixbar650cpro.zip.
Refer to Creating vis files from d4 personalities for more details.
More examples:


